What to expect if you want signage
“That’s cool to see that things are still done by hand,” is a quote we love to hear while we are working on large signage no matter the venue.
Design today, for the most part, is often digital, but there are still those nuggets of hand lettering that pepper city landscapes across the good ol’ Texas. Walking around the city of Austin, you can see drink signage, menu boards, and welcome signs all done by hand giving that venue a bit of personal touch right off the bat. This type of signage comes in great for wedding planners looking to add a sense of “warmth” to their events, or hotel and retail venues looking for added appeal to their ambiance.
Let’s walk through what we’ve learned over the years into what goes into making one of these temporal pieces of art. We’ll go over supplies, design choices, and when it makes sense to upgrade to a professional for your signage.
Why hand written Chalkboard Signage?
It brings any menu, list, or welcome signage to life
Allows for chalkboard to be customized to the environment’s aesthetic
Instantly elevates the decor of the space
If you’ve ever been to a bar, looked at the drink choices on the wall in big hand written letters and thought “hmm, that looks pretty cool” and didn’t even think about the fact that the menu was real easy to read, you’ve come across the handy work of a signage artist that really knows what they are doing. The whole idea behind making great signage isn’t just about making “fancy” letters but about making it easy for customers and guests to easily read and understand what the sign is communicating to them. On top of that, the added personal touch of realizing that someone took the time to write all that out instantly creates deeper connection with guests because we all know how much easier it is to just have something printed out and pasted on.
Essential Supplies for Professional Results
Chalkboard or mirrored surface
Water based chalk markers
Blue painters tape
Measuring tape
Gloves
Glass cleaner
Paper towels or micro fiber towels
Camera
Ladder
Rulers (18 inch and 48 inch)
Chalkboard Surface Comparison
| Surface Type | Best For | Durability | Cost | Our Recommendation |
|---|---|---|---|---|
| Pre-made A-frame | Retail sidewalks or Event Spaces | Low | $–$$ | Great for multiple signage to be placed in more than one location or in front of a retail venue. |
| Custom/DIY plywood + paint | Large event signs | Medium | $–$$$ | Deepending on event needs, these can be a cost effective solution for a one time event or durable for multiple events at a higher price point. |
| Wall-mounted panel | Hotel lobbies | Very High | $ | Usually comes with the venue you are having the event at. Great for wedding seating charts or menus. |
Step-by-Step: How to Create Chalkboard Signage
First and foremost, get the dimensions of the space you’ll be working on. If it’s a wall mounted surface, go to the venue and measure it yourself, trust me.
Understand the environment the chalk board will be sitting in.
How far will the viewer be looking at it from? Is it behind the bar or on the sidewalk?
What is the aesthetic of the atmosphere? Is it mid-century upscale or modern retail trendy?
On a sheet of paper and draw the dimensions proportionally of the space you’ll be working on.
Proportions are important for layout. Don’t sketch out a square if the space you are working on will be a rectangle.
Once you have your layout finalized, measure content chunks so you have reference points when you start working on the actual chalkboard.
Grab your chalk markers, painter’s tape, rulers, glass cleaner, paper towels, and ladder(if needed) and head over to the chalkboard.
If the chalkboard isn’t already clean, get to scrubbin’ with your paper towels and glass cleaner.
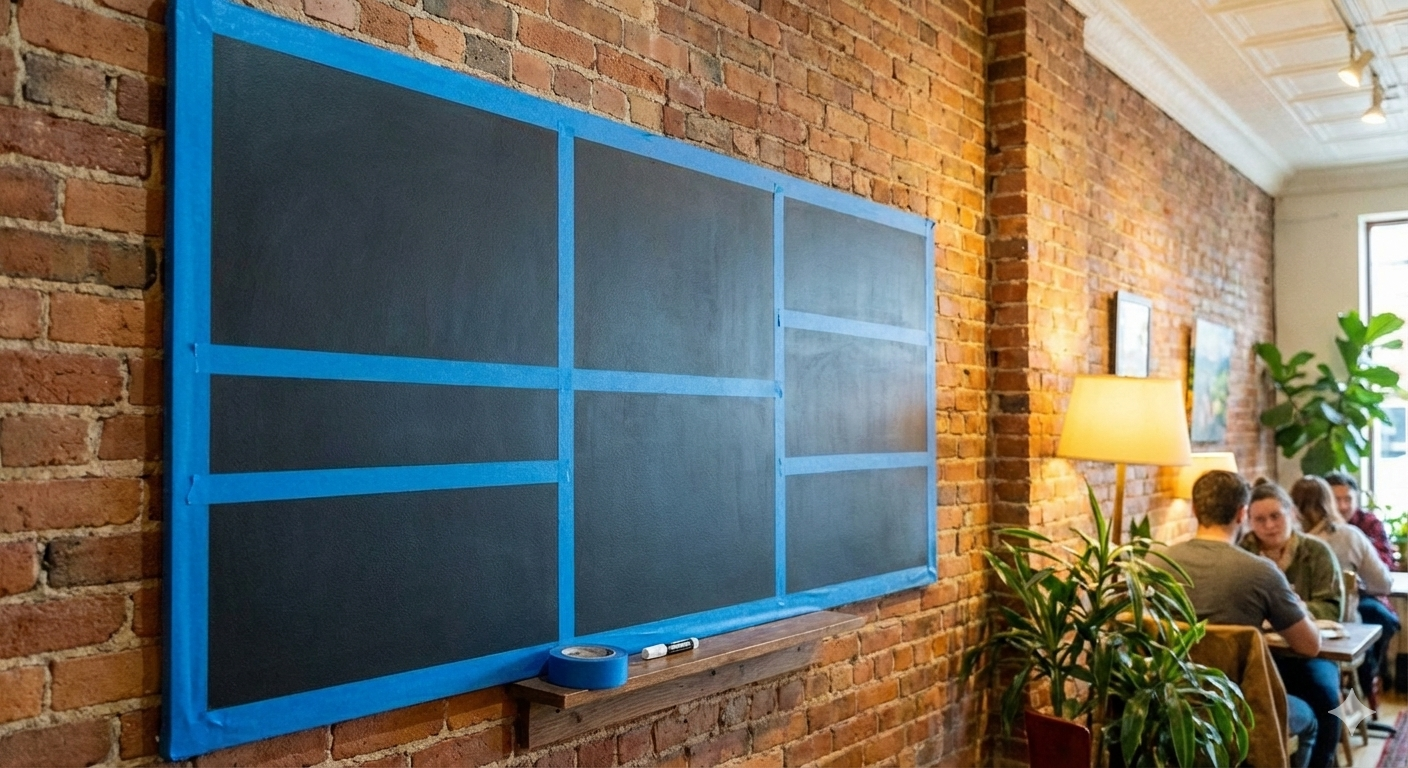
Use the painter’s tape to section off different parts of the chalkboard for each content piece.
It’s best to layout the whole chalkboard first, this way you can tell if you need to enlarge or scale down areas based on how close or far the viewer will be.
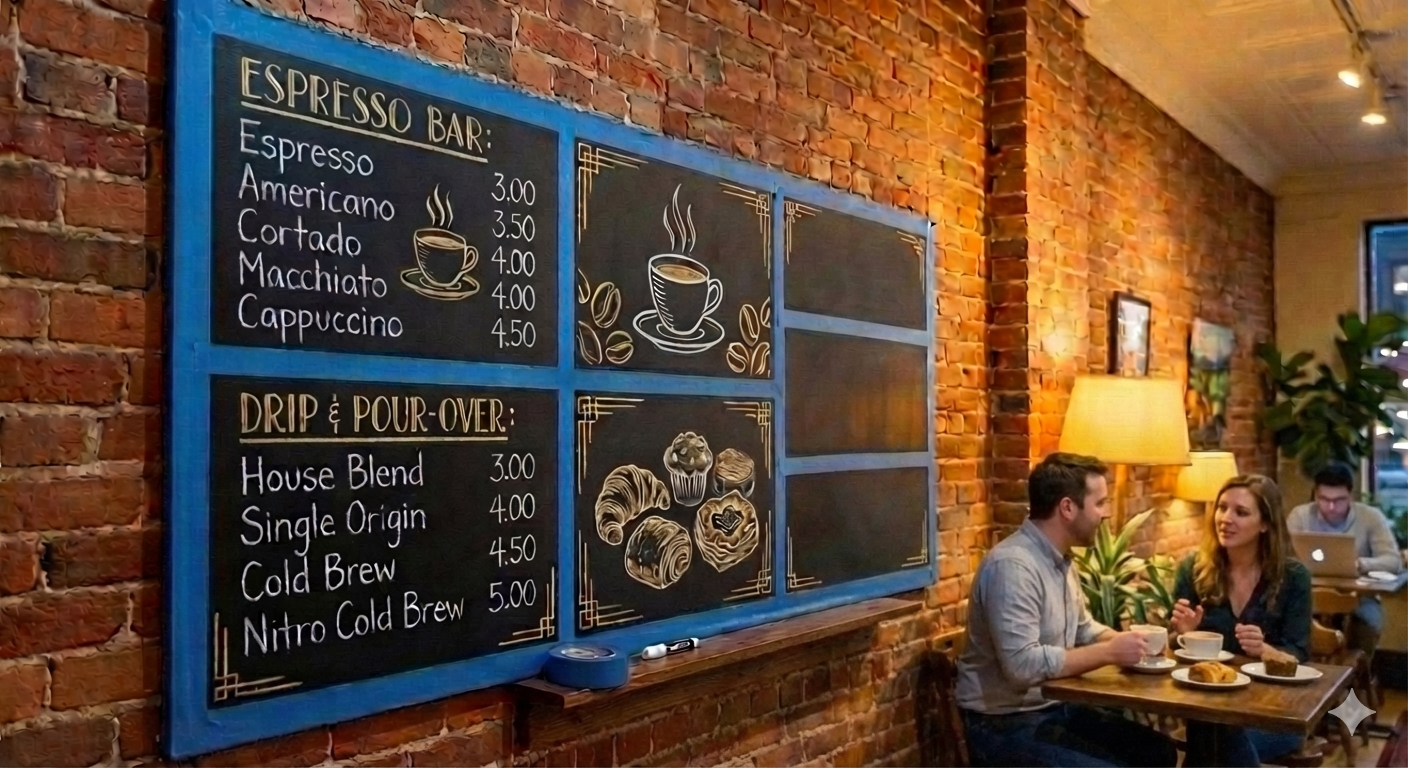
Draw out the menu with the chalk markers. A tip on keeping letters straight along large horizontal distances is to use a long piece of blue painter’s tape as your baseline.
Once you’ve got all your letters written down for a section, go back and draw any illustrations that you might have included in the layout.
Repeat steps 9 & 10 until you’ve finished your entire chalkboard.
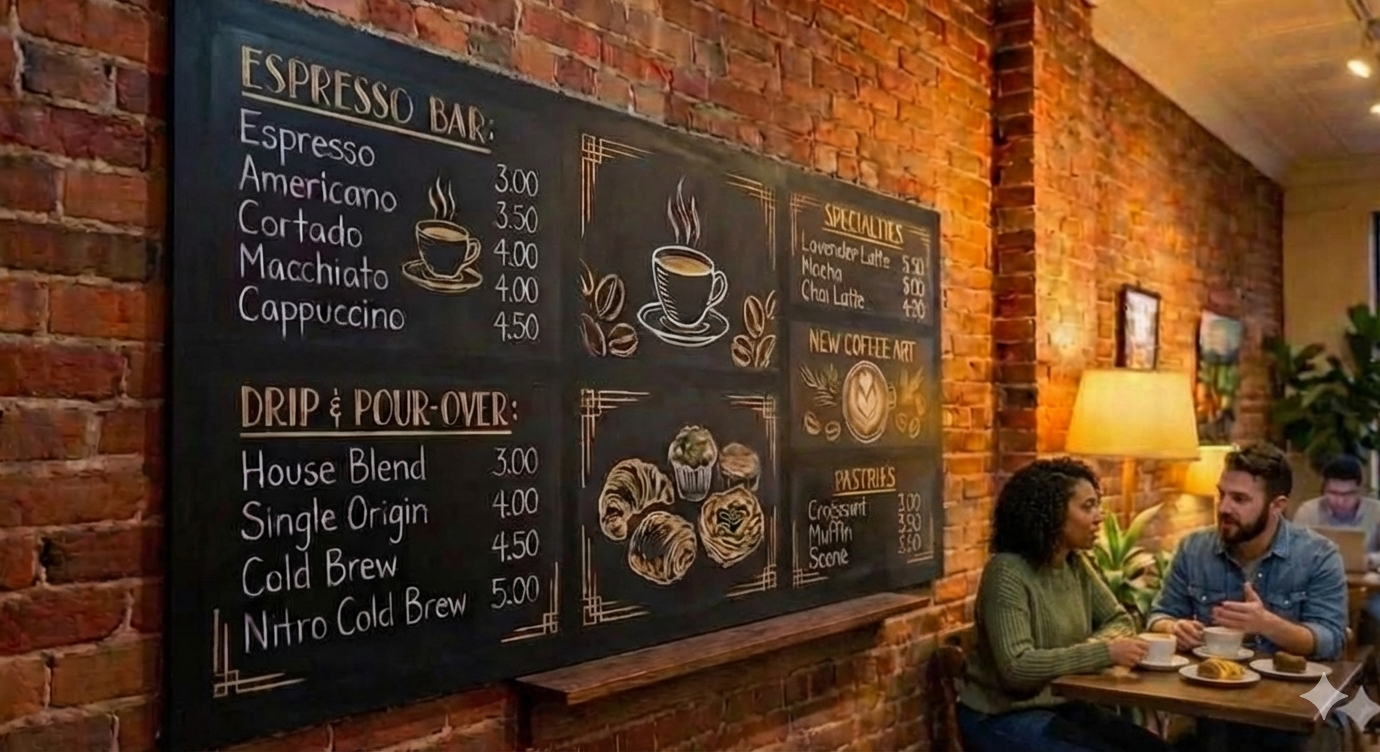
Remove the blue painter’s tape and pat yourself on the back for a job well done.
Tips & Common Mistakes to Avoid (and How We Fix Them)
Use your 18” or 48” ruler if you need to make straight line.
Make sure to take a ladder or ask the venue if they have one you can use. You will need a ladder for any big chalkboard mounted at a venue.
If you make a mistake with chalk marker, don’t leave it there and get back to it later after it’s dried. Erase the mistake right then and there because once the chalk marker has dried you need a little elbow grease to get it to come off when it’s dry and sometimes you end up smudging letters next to the mistake, and so you have to erase those letter now too and it ends up being more work and taking longer than if you had just erased it while the ink was still wet.
Getting into a time crunch is never fun and if you have to get measurements fast for you layout fast, leverage AI. Give the AI a signage maker prompt role, give it the dimensions you are working with, tell it the layout you’ve sketched out(e.g. Generate the layout with two columns for food items on top, make three columns for drink items under the food items, and two columns for the desert items under the drink items). This isn’t an AI prompting course but if you’re interested in learning how to leverage it to speed up your layouts, let us know and we can write a how-to guide about it. Feed the AI generated image into your favorite image editor and use the measurement tool to find out what the actual size is you need to make everything.
This same process works for large mirrors used for event signage and wedding seating charts.
Venue-Specific Ideas & Inspiration
Events & Weddings: seating charts, directional signs, bar menus, welcome boards
Hotels: food menus, drink menus, daily specials, spa menus, lobby welcomes
Retail: sidewalk A-frames, product highlights, seasonal promotions
When to Upgrade to On-Site Professional Calligraphy
When it comes to big stationary signage that many guests or customers will see over a long period of time, we recommend going with a professional. Chalkboards or mirror that needs to be “on brand” would also benefit from a professional who has worked with big brands before and knows what to expect when brand guidelines are more rules than guidelines.
Wouldn’t you know it?! We happen to be professional calligraphers with the experienced in creating beautiful menu boards and signage! What a coincidence! Go figure how this all worked out?
All jokes aside, if you are ready to create some custom signage, follow the steps above—or send us an email so we can start collaborating on the experience you want your guests to have once they walk into your space.
FAQ Section
Q: What kind of chalk markers last longest on outdoor signs?
A: Sharpie water based chalk markers are our favorite.
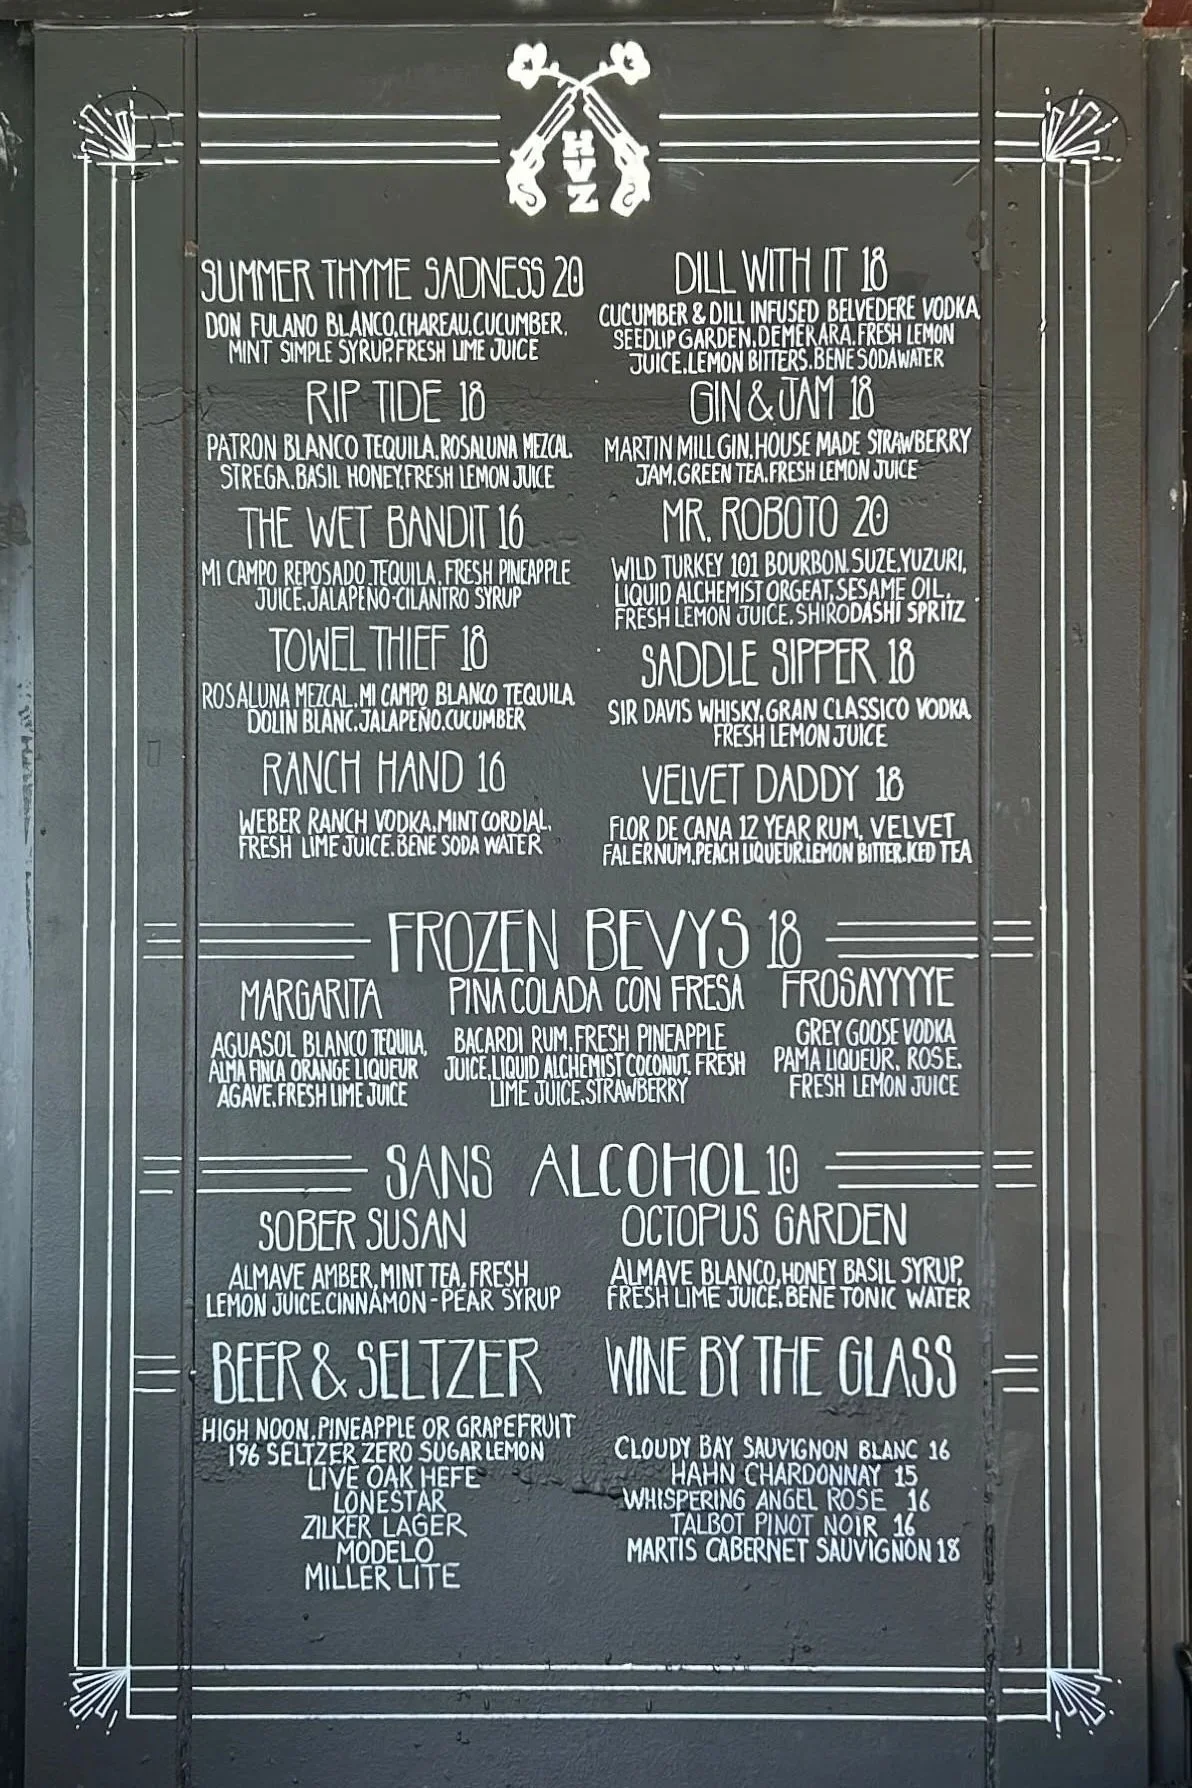
Q: Can chalkboard signage work for luxury hotels?
A: Absolutely, the menu you see here is by the pool at Hotel Van Zandt.
Q: How long does something like this take?
A: It always depends on how much detail, decorations, and illustrations are wanted. What you see on the right took approximately 7 hours factoring in prep work and actual lettering.
Author Bio
Luis & Ana are the Mexican-American artists behind Handsome Ink Studio in Austin and San Antonio. Specializing in live calligraphy, hot-foiling, and personalized engraving, they’ve elevated events for Diptyque, Blue Poppy Events, and many luxury hotels and retailers across Texas.